On bad days, my robot hoover tries to overcome the legs of the clothes horse and sometimes fails. Then shit happened again.
The widespread solutions with "wings" or clothespins as an obstacle did not convince me, so I simply designed a few risers that can be clamped to the feet of the clothes horse. The only function is to raise the legs by 1 centimeter, which is enough to trigger the bumper on the vacuum cleaner.
The riser is designed for a pipe thickness of 16 millimeters and should also be able to be clipped onto thicker pipes. Thinner pipes are also possible, then simply wrap a little tape around the pipe a few times to give the riser a hold. Gaffa will do the job, or you can use a few drops of hot glue.
You can download the necessary files from my thingiverse or prusa3d account.
I hope the thing is useful for you. Some of the links are suggestions for parts to replicate the thing and affiliate. If you buy something, I get a small commission. The price you pay is the same. Thank you very much.
As some of you know, I hate nothing more than housework. Therefore, everything that is possible is automated here. For example vacuum cleaning. A Roborock S5Max is working on the floors in our lumber room, but what about the crumbs from the cake on the tablecloth? This is the job of the recently released MI Vacuum Mini Cleaner, an accu-powered mini cyclone vacuum cleaner that does its job well, but unfortunately comes without a wall bracket.
So I just broke a simple and hopefully functional design from the fence, which is based on the same of the Xiaomi designers. I say so now ... ;-)
However, here it is for your convenient use. I printed it with matte white Extrudr PLA NX2, which is beautiful and goes well with the matte finish of the cleaner. However, here it is for your convenient use. I printed it with matte white Extrudr PLA NX2, which is beautiful and goes well with the matte finish of the nipple. You don't need to use supports when printing, or you may have problems removing it from the cable duct in the floor. You can use the part with the two openings on the back that are intended for attaching the holder to the wall with two screws. By the way, the distance between the necessary holes would be 40mm.
Have fun with printing and always good 1st layer adhesion ;-)
I hope the thing is useful for you. Some of the links are suggestions for parts to replicate the thing and affiliate. If you buy something, I get a small commission. The price you pay is the same. Thank you very much.
1st published @ thingiverse
Vor einiger Zeit hatte ich bei thingiverse ein Teil veröffentlicht, mit dem es möglich ist, in Verbindung mit dem empfehlenswerten "AmoredPI" Gehäuse 2,5" SSD Festplatten mit dem Einplatinenrechner Raspberry PI 3 bzw. 4 zu verbinden und so das übliche Gedrösel mit dem Kabelwirrwar etwas abzumildern.
Indessen war bis vor kurzem der Start des Raspberrys von der SSD auf die 3er Modelle beschränkt. Nun ist seit September dieses Manko Geschichte und es steht dem Betrieb des Rechners via Festplatte nichts entgegen. Fast nichts. Denn leider gibt es keine Garantie, daß jeder SSD / USB3 Festplattenadapter für den Betrieb geeignet ist, zumindest, was das Booten betrifft. Michael Kofler hat in seinem Blog unterschiedliche Adapter getestet, er hatte mit dem von GHB vertriebenen 6GB Adapter die wenigsten Probleme, weshalb ich auch meine Empfehlung auf ebendiese abgebe. Der bisher von mir auf den PIs der 3er Reihe ohne Probleme verwendete Adapter führte bei mir in keinem Fall zu einem fehlerfreien Systemstart oder dauerhaft störungsfreien Betrieb. Wenngleich der Raspberry PI 4 damit verbundene SSDs erkennt und auch problemlos liest bzw. schreibt, ist der Bootvorgang fehlerhaft. Inzwischen läuft hier ein Raspberry PI 4 mit 8 Gigabyte Speicher und einer Silicon Power SSD 256GB 3D NAND A55 SLC Cache Performance Boost seit mehreren Tagen ohne Probleme, wenngleich Lesevorgänge beinahe doppelt so schnell wie Schreibvorgänge sind, was ich allerdings noch mit anderen SSDs wie der SanDisk SSD PLUS 240GB Sata III gegentesten muss.
Die Installation auf die Platte verläuft problemlos, ich habe zuerst den üblichen Weg mittels einer MicroSD Karte und NOOBS beschritten um sofort die aktuellste Raspbian Version auf der Platte zu haben, es funktioniert natürlich auch der über ein via etcher auf die MicroSD Karte geschriebenes Image. Nach der Aktualisierung des Systems aktiviert man via 'sudo raspi-config' die Boot Option über USB, formatiert die SSD, entpackt darauf NOOBS und bootet dann (hoffentlich) erfolgreich von der SSD. Natürlich muss dazu die MicroSD Karte abgezogen sein. ;-)
Update 14. November 2020: Dieser Adapter von ugreen ist ebenfalls kompatibel und sogar noch etwas günstiger als der oben verlinkte.

Halloween kann kommen. Ausstecherförmchen sind fertig gedruckt.

The 4 Axis digital display (DRO) from Ditron, I installed on my milling machine (Chinese F * 45 class) enables the RPM to be displayed during machining. Unfortunately it is a little tricky to attach the Hall sensor used for this to the spindle in such a way that it can pick up the signals from the magnet, which functions as a transmitter, without disturbing the work.
I also like to use anLED ring lightto illuminate the work area of the tool. So it made sense for me to combine both and cobble together an adapter flange. Maybe someone else can use the part. I printed withSpectrum PLA Proon myAnyCubic I3 Mega.
Available at thingiverse and prusaprinters.org
Releasenotes:
Initial Version 2.1
Seit einigen Wochen nervt mich ein dauerhaftes Provisorium ™ an einer Fräse. Ein Hallsensor greift die Drehzahlen der Spindel ab, gleichzeitig soll ein China LED Ring den Ort des Geschehens adäquat ausleuchten. Viel Platz ist auch ein Fremdwort. Also alle Werte in FreeCAD eingegeben, einmal Enter gedrückt und fertig ist die Laube. Oder so ähnlich. Bevor ich das als Aluteil fertige, soll der 3D Drucker mal den Prototypen runterlassen.

 In order to increase the suction power of my Kärcher WD 3.300 M (but should fit all Kärcher vacuum cleaners with standard hose like the WD3) workshop vacuum cleaner, it is possible to increase the hose diameter from the 38mm inside diameter (40 outside diameter) to a whopping 50mm. In particular in connection with the well-known Chinese cyclone dust separators, the suction power increases significantly. But not only with this, even without a cyclone, the efficiency of the Kärcher vacuums can be significantly improved.
I designed the hose adapter as a combination solution. You can either use a 50mm spiral hose or use the adapter with 50mm HT pipes! When using spiral hoses, I recommend additionally securing the hose with a hose clamp. Please note that the hoses that I show in the one photo tend to contract when you turn on the vacuum.
I printed the adapter in PETG from Goedis. PETG is elastic and resistant to oils such as those found in my workshop. Be careful of static electricity and make sure that it is properly discharged! You can pull some earth wire through the hoses to discharge the static charge. This must be laid from the beginning of the hose to the dust container and be earthed.
When printing, please only activate supports from the platform and manually set supports in the locking groove. The internal hollow locking mechanism is otherwise blocked by supports that cannot be removed. (See the sawn part in the last picture.)
At this point I would like to point out the excellent Kärcher WD-Series hose socket to DN 50 adapter from ralondo. The thing is the counterpart to my adapter, it enables, for example, the connection of hoses to HT50 pipes.
Download & more @ thingiverse
I hope the adapter is useful for you. Some of the links are suggestions for parts to replicate the thing and affiliate. If you buy something, I get a small commission. The price you pay is the same. Thank you very much.
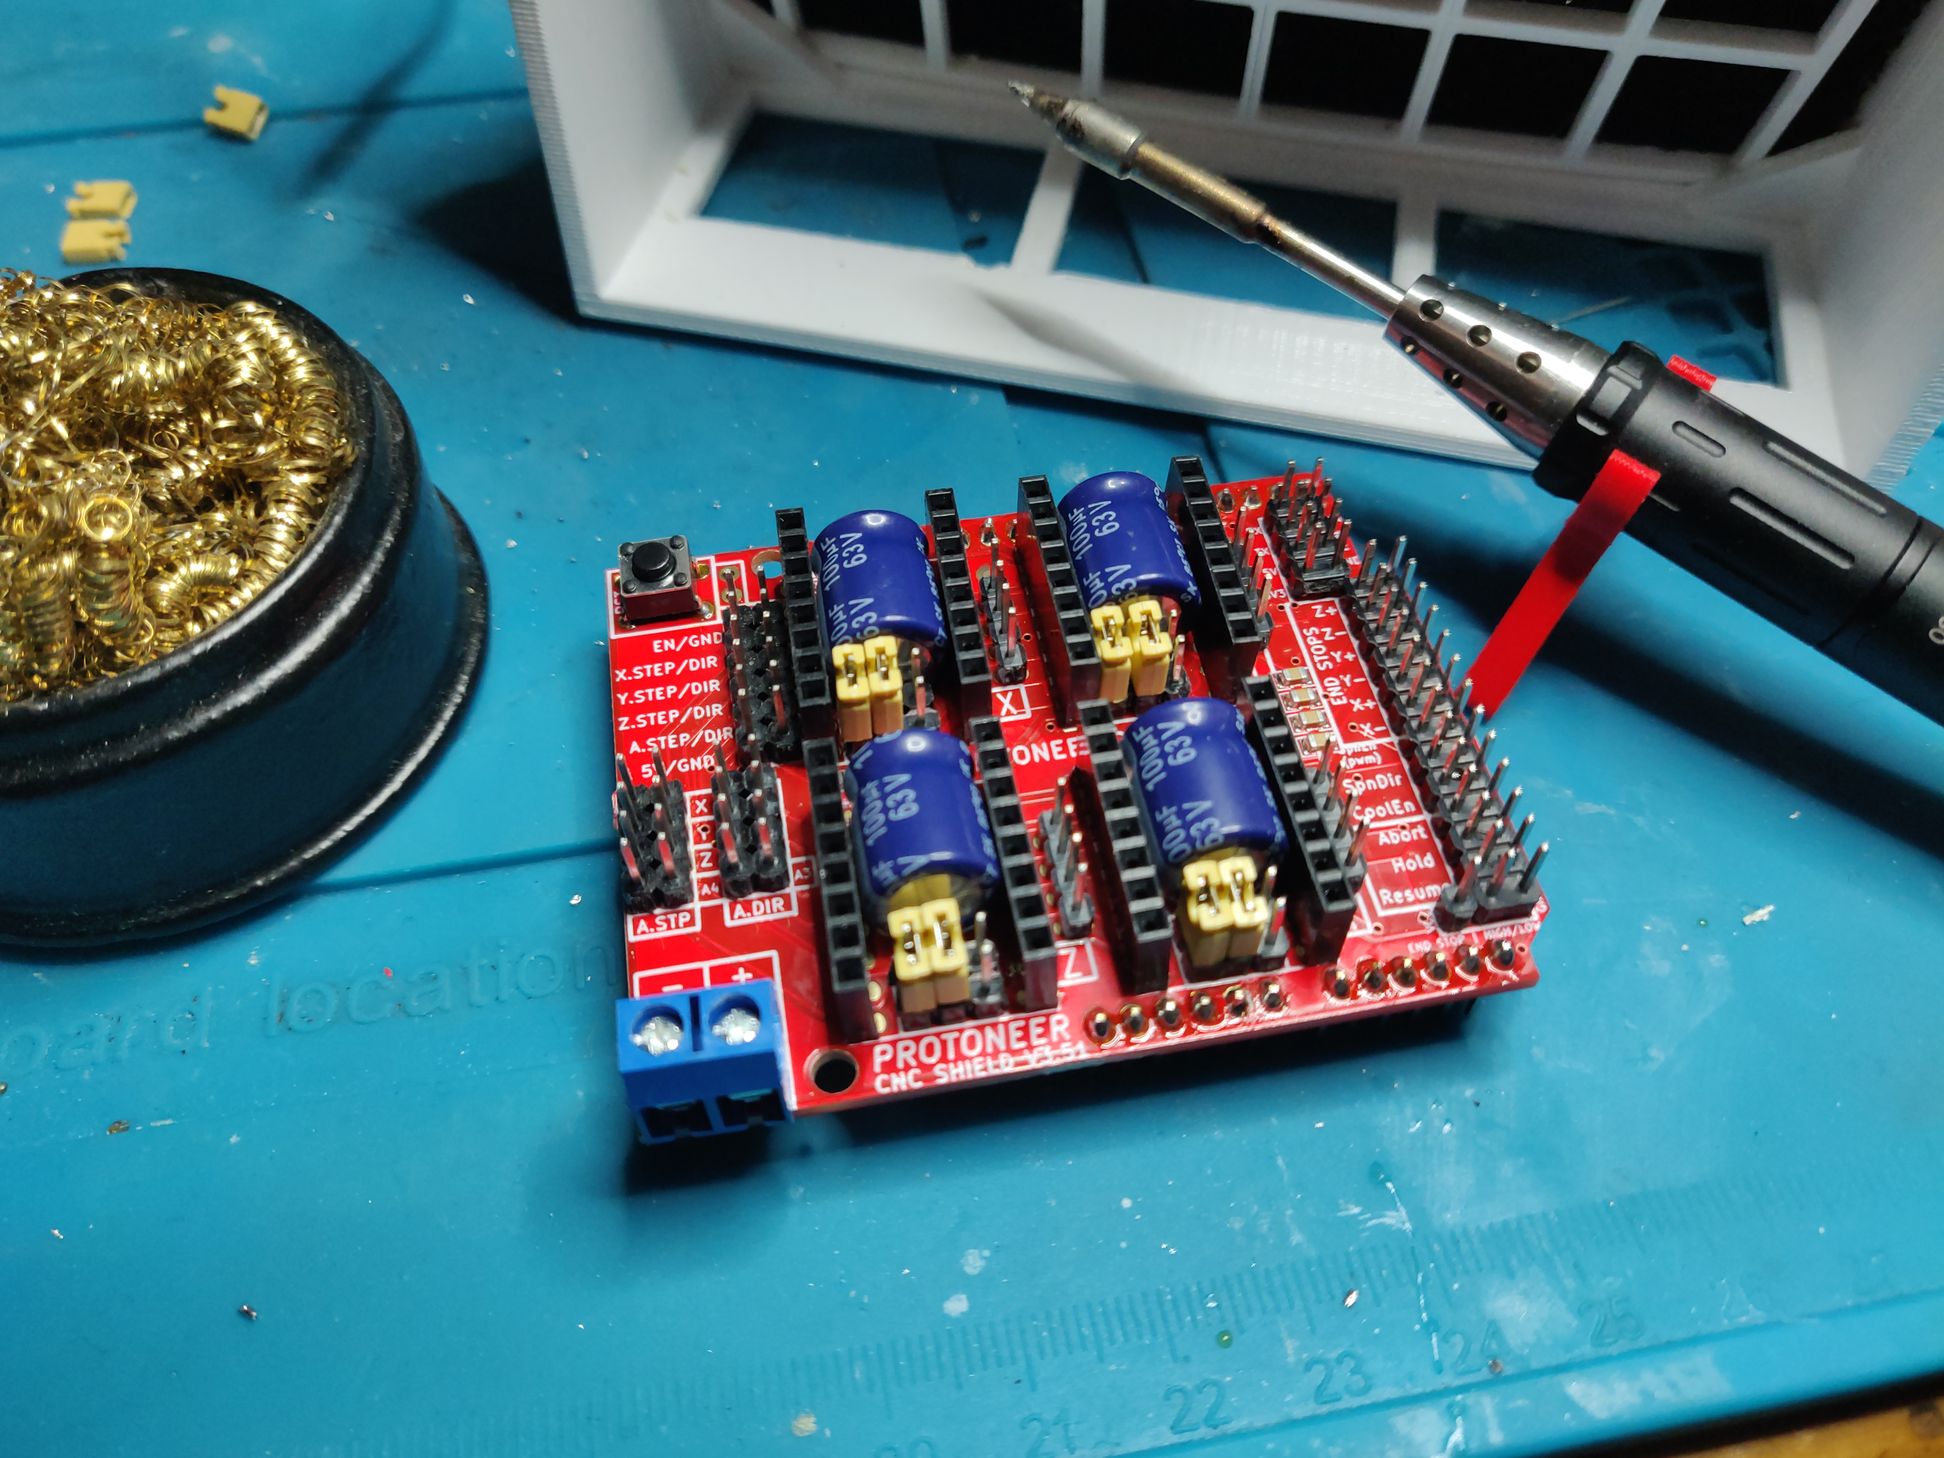
Als Controller in kleineren CNC Maschinen / Drucker Projekten wird oftmals ein Arduino mit CNC-Shield, auf dem drei A4988-Schrittmotor-Treiber verbaut sind, verwendet. Das bekommt man im Bundle bei Amazon oder eBay für um die 20€ mehr oder weniger hinterher geworfen.
Das CNC-Shield leitet die Anschlüsse des UNO etwas günstiger auf dei Schrittmotorentreiber usw. um und ist vor allem hinsichtlich GRBL zum Ansteuern der Maschine notwendig und eigentlich wegen der gut dokumentierten Pins selbsterklärend. Zumindest, bis man auf die verwegene Idee kommt, Endschalter zu verbauen und an denen für die Z-Achse scheitert. Nachdem auch der 2. CNC Shield keinerlei Anstalten machte, einen ausgelösten Endschalter an den Arduino weiterzuleiten bin ich auf die Idee gekommen, die Pins zu vermessen. Im Ergebnis habe ich festgestellt, daß kein Signal anliegt. Man findet dann recht schnell ziemlich versteckt in der weiten Welt des Internets den Hinweis, daß die Version 3.0 noch auf der Pin-Belegung von GRBL v0.8 basiert. Heutezutage ist jedoch mindestens die Version 0.9, besser jedoch 1.1 aktuell. Daher muss der Endstop für die Z-Achse auf die Pin-Header mit der Beschriftung „SpnEn“ gesteckt werden! Der CNC Shield ist erst in der Version 3.51 auch Pin-kompatibel zu GRBL 1.1. Bei Amazon oder den üblichen China-Shops bin ich bis auf die auch bei protoneer empfohlenen Fertigbausteine bei elecrow nicht fündig geworden. Man kann die aktuelle Version 3.51 jedoch problemlos via ebay bei protoneer in Neuseeland als Bausatz bestellen oder als Fertigbaustein.
Der Preisunterschied ist minimal und lohnt sich kaum, ich habe das Experiment jedoch gewagt: Nach nicht einmal 5 Tagen war die Lieferung aus Neuseeland im Briefkasten, die Platine ist in einer halben Stunde fertig gelötet.
Some of the links are suggestions for parts to replicate the thing and affiliate. If you buy something, I get a small commission. The price you pay is the same. Thank you very much.
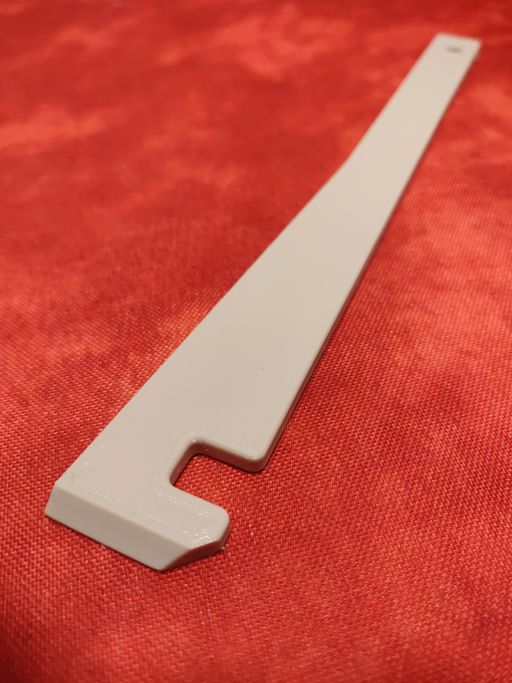 I was always annoyed that with the Vitamix Nutrion / Smoothie Maker & Blender, the remains of the mix under the knife are very difficult to get out, especially when the consistency is a little firmer. That's why I scribbled out a quick draft for a spatula.
There is probably no price for the "design", I was more interested in the usefulness.
It fits both large and small containers, I advise printing the spatula in PETG, which is a little bit more food-safe than ABS and can also be put into the dishwasher.
Project page & Download @ thingiverse
Some of the links are suggestions for parts to replicate the thing and affiliate. If you buy something, I get a small commission. The price you pay is the same. Thank you very much.
With my small 3D router, the cables of the milling spindle are to be laid in a drag chain. Since I am extremely stingy economical and therefore like to recycle leftovers, I used a leftover piece of a 7×7.3 drag chain. Since the ends of the other part of the drag chain are installed elsewhere, I just scribbled and printed out 2 ends in 3D. Fits.
The parts can be downloaded from Dingsbums.
Some of the links are suggestions for parts to replicate the thing and affiliate. If you buy something, I get a small commission. The price you pay is the same. Thank you very much.