Combined fan / drag chain holder for NEMA 17 Extruder / X-Carriage Mount AnyCubic i3 MEGA
 The AnyCubic i3 MEGA is a good printer, but I did not like the cable management right from the beginning, so I immediately switched to drag chains for the printhead. So I used Michelx parts, because these fit perfectly and work'd well. Since I converted my printer very fast to the Bowden MK3 R3 X-carriage for the Anycubic I3 Mega or Anycubic I3 Mega Prusa i3 X-Carriage Converter, of course, the Schleppkette / drag chain design of Michelx no longer fit.
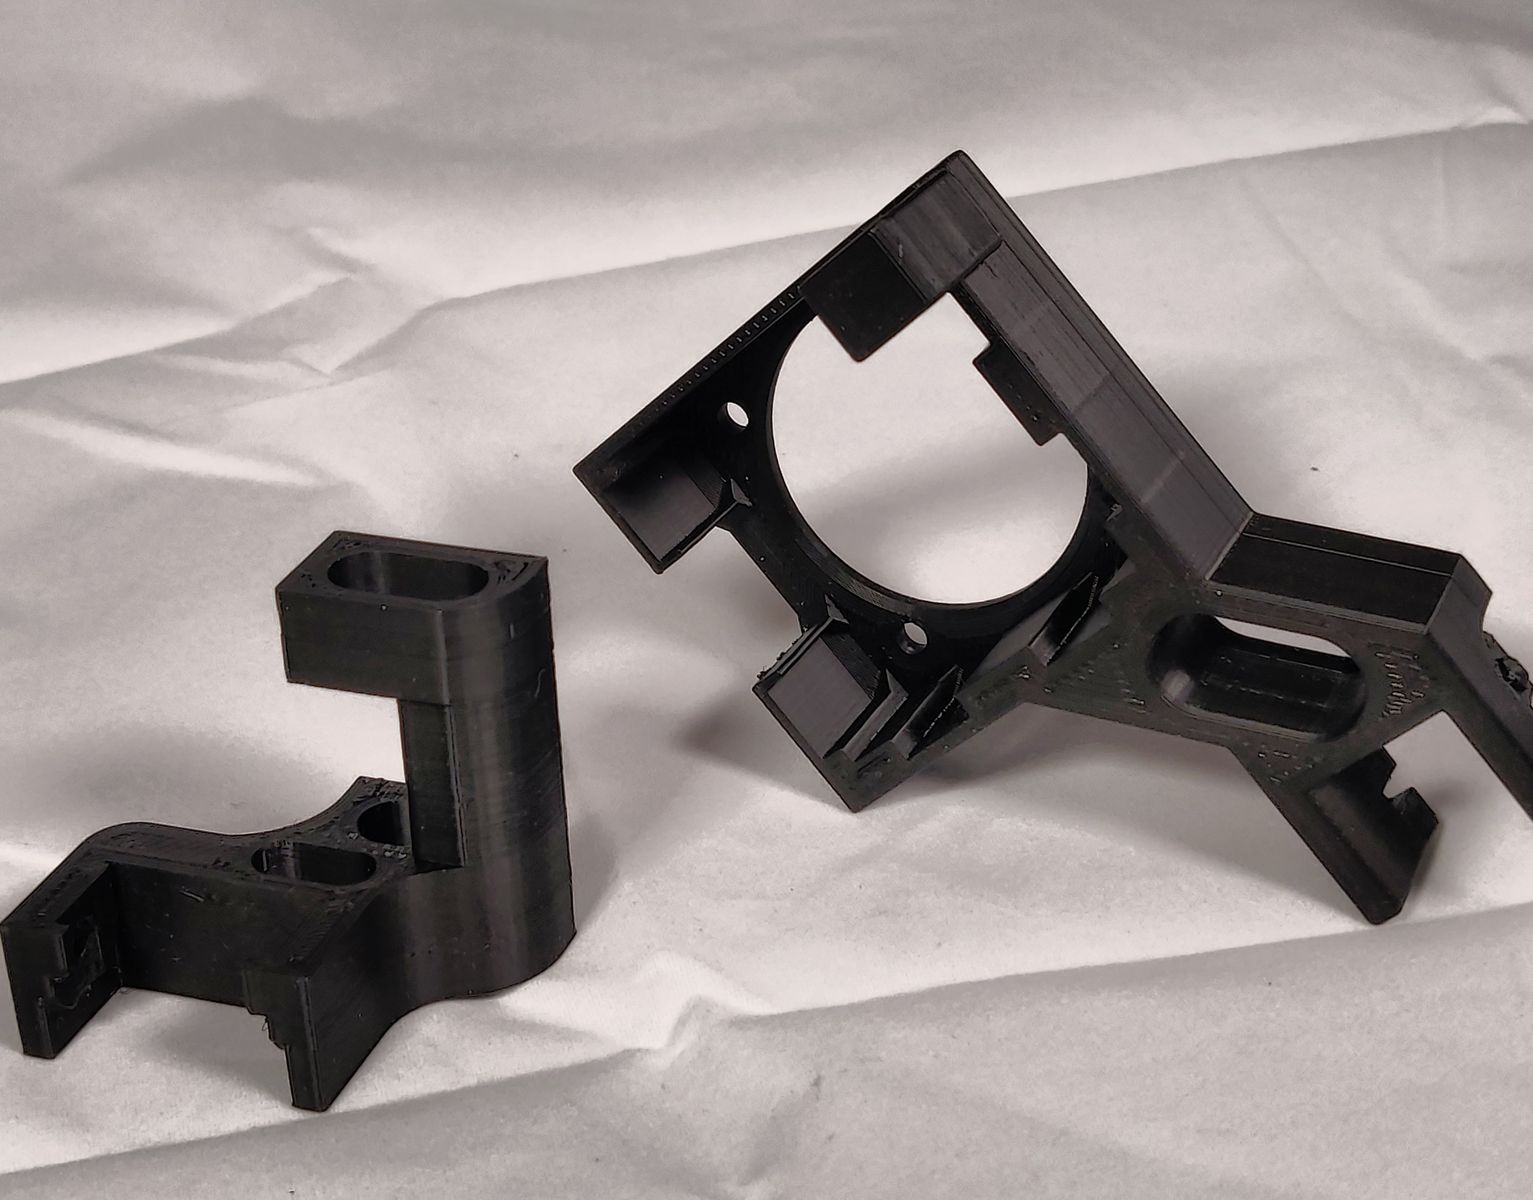
I worked with this thing from makercan for a few months, which works well too. Since my extruder motor has to do a lot more by expanding it to a Titan Extruder and to avoid any step losses due to overheating, I have designed a combined solution with a 40x10mm cooling fan mount from scratch.
In the course of this I also redesigned the holder for connecting the drag chain to the printhead unit, as I was not satisfied with the stability of the mentioned thing.
The basic concept stands and works stable and reliable with drag chains from HaoBase. In addition, the drag chain can still be secured with a cable tie. The NEMA 17 holder is held by an M4 screw, an existing thread is used.
Possibly also other drag chains may fit. I have specially designed the tolerances so that 10x20mm drag chains links with a maximum radius of 12.5 millimeters and a bore of 4 mm and the inside dimensions of 22.5 (20.0) x10mm may fit.
I recommend Noctua NF-A4x10 FLX fans. They differ significantly in the quality of cheap variants, which is also reflected in the manufacturer's warranty of 5 years. By the distances of the mounting holes of 40mm but also every other fan should work.
However, in that case it might be necessary to look at the fixture again: I have installed the flow channels in the fixture to work with Noctuna's vibration dampers. If you plan to bolt your fan with ordinary screws, you should be aware that air can flow through these channels on the outside of the engine!
The construct has been running satisfactorily for a while now, so I'll probably just change some minor details in the future.
So, here ist is, printed with Filament from Goedis: Black PLA.
I suggest 20% infill, 0.20mm Height of Layer, 1,06% Flow, 215° Nozzle, 60° Heatbed and 60% Cooling. (As I said before, I use an Titan Extruder and Sunon Fans, you'll try it with your Standard PLA Settings). I have set the Support pillar resolution to 1mm size in Simplyfy3d. So I have no problems with any artifacts in the intake of the drag chains: they rest - as it should be - with a full "click" and hold. Bomb-proof.
Some of the links are Affiliate. If you buy something, I get a small commission. The price you pay is the same. Thank you.
source: thingiverse
 I needed a